Booking events and classes in SimplyBook.me


Use SimplyBook.me to accept bookings for your class
How is it possible to create events and classes in the appointment booking software is a common question. This is in fact quite easy in SimplyBook.me if you follow the instructions here below.
First of all to create class it is important to look at the service provider like class definition and the service as the class description and duration. The provider is set up with information such as how many can attend the class at same time, and the provider is also defined to be available at the hours that the class is available.

First select provider from the menu to set up definitions of the class that can be booked.
When the provider has been selected, set up the class definitions.
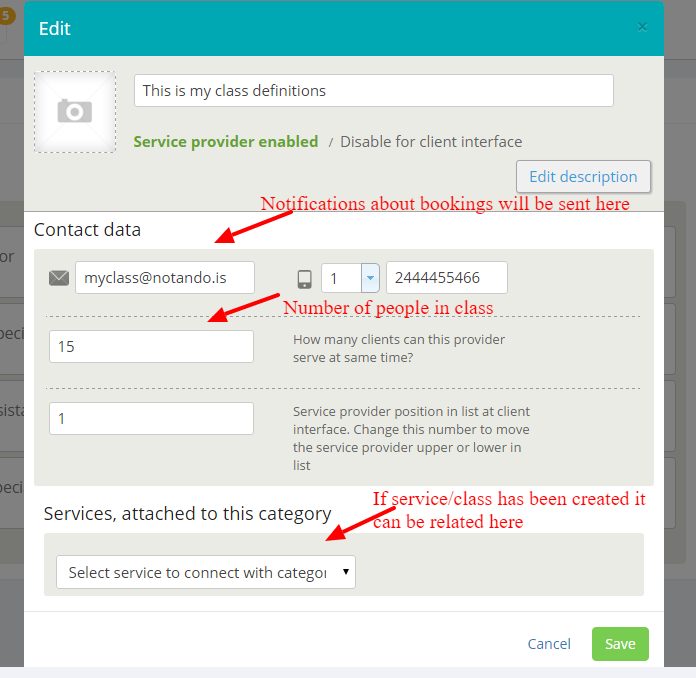
Provider name can be the same name as class. Also set how many people can attend the class and where booking notifications should be sent.
Then go to Provider’s list, and click on the clock if this class occurs every week, or click on the calendar if this class is more like an event and occurs only one time or few times.
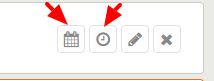
Press the relevant icon according to if the class occurs one time or few times or if it is occurring every week.
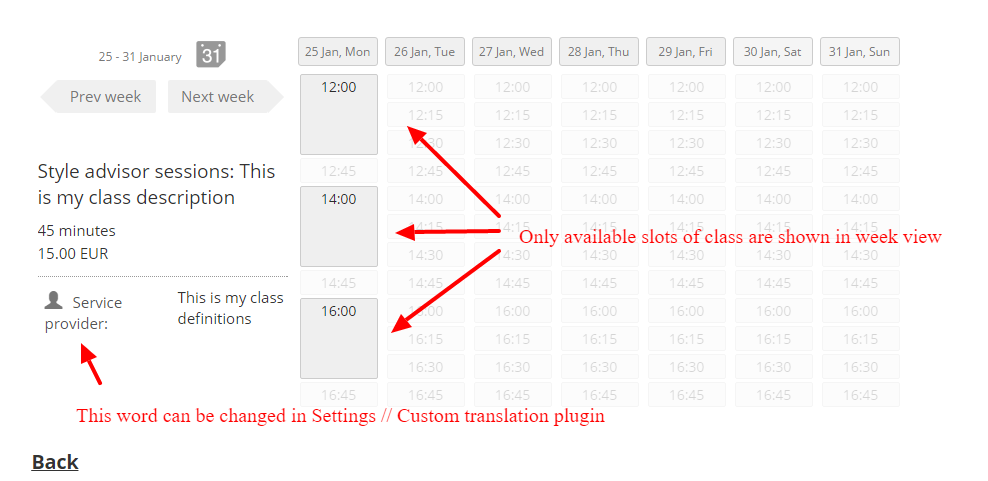
When you are in the time settings, week view, you can click on the slots that you want to make open for this class. Make sure you open enough time in each occurrence so that the duration of class fits in the slot. If class is for example 45 minutes, then you need to open 3×15 minutes slot each time the class can take place.
The class can take place several times during the day, and it can happen on any day of the week. You control this by clicking the relevant time slots for the provider to open. If you get a message that providers hours can not be longer than company hours, you need to go to Settings // Company hours, and make sure that company always has open slots when the class can take place.

In the providers opening hours settings, you can choose when the class takes place and clients can book to participate in the class.
When the provider definitions have been set up according to class definitions, it is time to set up the service that relates to the class. The service is actually what the client will be choosing during booking process, so make sure you set the correct class name and description by the service. Go to Manage // Services, in the Menu on the left side and click on Services, and select to create a New service.
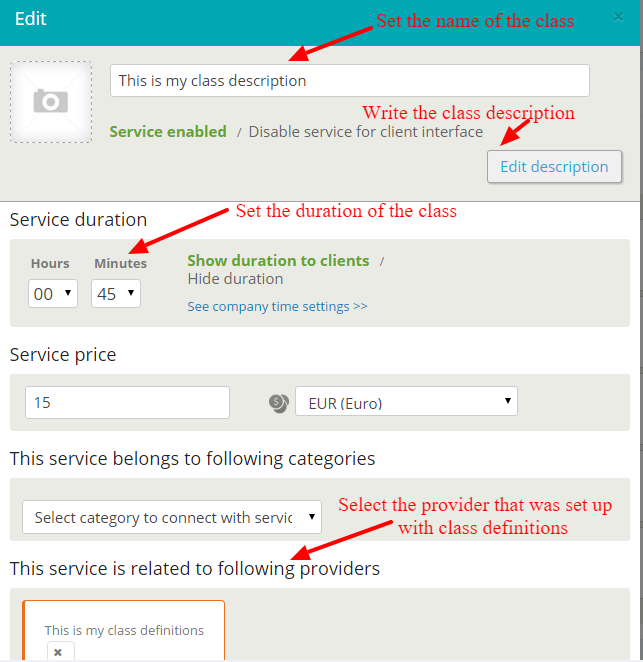
Set the service up as the class, with all relevant descriptions. This is what the client selects when he wants to book the class.
In the service settings you set the duration of the class, this time must fit in the slots you created as the provider’s working hours. You can set a price for the class if you want to charge clients for attending it. Finally you should relate the service to the correct provider that was set up for this class.
If you look at your booking page, you will notice that classes are already bookable. However, there is an unnecessary step where the client first selects a provider and then the service. We can get rid of the service provider selection by using the Any Employee plugin. Go to the menu on the left and select the Plugin icon, and click plugins. You can then find a plugin called Any Employee plugin. Please activate this plugin and then go to the plugin settings.

Activate the Any Employee plugin to set providers as hidden and thereby simplify the booking process.
In the Any Employee plugin settings, you only need to check the boxes that set providers as hidden as you may want to dismiss the provider’s selection step completely.
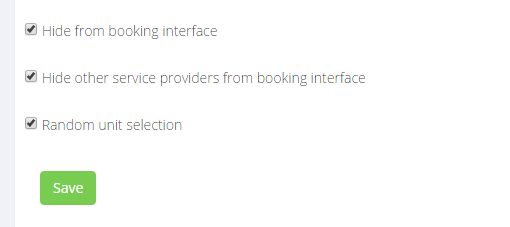
Check the boxes and set providers as hidden to simplify booking process for classes.
If you now look at your booking page, you will find that your clients can book classes at the hours that you set them as available. The will only select the relevant class, and then choose the time of week that suits them. If you want to allow clients to book many classes before check-out, you should activate the Multiple bookings plugin.
Also remark that the wording of the booking page may sometimes not fit classes. In this case, simply go to Settings // Custom translation. Select Client booking page module, find the words you want to change and save.
Your booking page is now ready to accept class bookings.


評論
0 comments暫時沒有評論